Personalized Gift Box
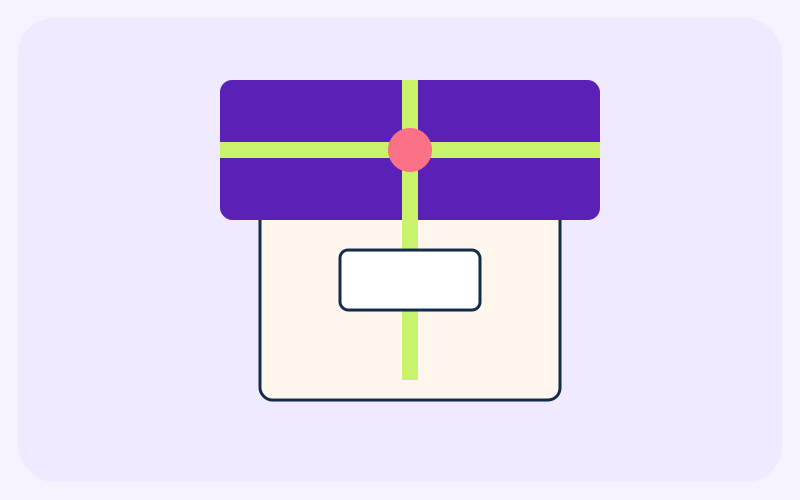
A lidded box from 2 mm card. The floor is 12 × 8 cm and the walls are 5 cm, so the outside is about 12.4 × 8.4 × 5.2 cm once the card is counted. The lid interior is that outside plus 0.1 cm of ease on each side, so it slides over the base. A label and two ribbons finish it. Change the floor and you have to redo the lid.
- Difficulty
- Beginner
- Time
- 30–45 min
- Budget
- $4–$10 USD (15–37 AED)
Estimate; varies by location. The dirham figure uses the UAE peg of 3.6725 per US dollar, rounded to the nearest dirham. It is not a shop quote.
Materials
Ticks stay in this browser only.
Qty: one sheet large enough for the base net and the lid panels
Purpose: The box
Qty: a thin film on the tabs and the lid walls
Purpose: Joints. Tabs go on the inside.
Qty: 55 cm and 48 cm
Purpose: A cross on the lid and a small bow
Qty: 6 × 3 cm
Purpose: The name, glued after the ink is dry
| Done | Item | Qty | Purpose |
|---|---|---|---|
| one sheet large enough for the base net and the lid panels | The box | ||
| a thin film on the tabs and the lid walls | Joints. Tabs go on the inside. | ||
| 55 cm and 48 cm | A cross on the lid and a small bow | ||
| 6 × 3 cm | The name, glued after the ink is dry |
Tools
- Metal ruler
- Pencil
- Craft knife or sharp scissors
- Cutting mat
- A bone folder or the ruler, to score
Steps
Steps 1: Cut the base as one net
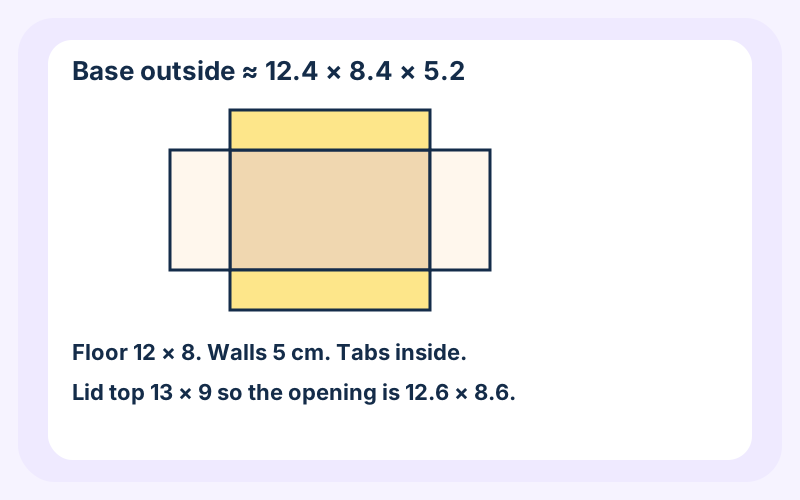
On 2 mm card, mark a floor 12 × 8 cm. Add a 12 × 5 cm wall on each long side. Add an 8 × 5 cm wall on each short side, and a 1.5 × 5 cm glue tab on both ends of each short wall. The short-wall blank is 11 cm wide (1.5 + 8 + 1.5) and 5 cm tall. Score every fold, then cut the net as one piece.
Steps 2: Fold the base and measure the outside
Fold the walls up and glue the tabs to the inside of the long walls. The tabs lie flat, so they do not eat the floor. The interior stays 12 × 8 × 5 cm. The outside grows by the card: 12 + 0.4 = 12.4 cm long, 8 + 0.4 = 8.4 cm wide, and 5 + 0.2 = 5.2 cm tall. Measure your box. If the card is not 2 mm, use that measurement for the lid, not the 12.4 cm figure.
Steps 3: Cut the lid from the outside you measured
Add 0.1 cm of ease on each side of the base outside. The lid interior is 12.6 × 8.6 cm. The top also has to cover the lid walls, so add 0.2 cm of card on each side: the top panel is 13 × 9 cm. Cut two long walls 13 × 2.5 cm and two short walls 8.6 × 2.5 cm. The short walls are 9 − 0.4 = 8.6 cm so they fit between the long walls. The lid wall is 2.5 cm, half of the 5 cm base.
Steps 4: Glue the lid and test the fit
Glue the long walls under the long edges of the 13 × 9 cm top. Glue the short walls between them. The opening should measure about 12.6 × 8.6 cm. Set it on the base before the glue sets. You want about 0.1 cm of clearance a side, not a rattle and not a force fit. If your measured base was larger than 12.4 × 8.4 cm, the lid was cut to the wrong number.
Steps 5: Check that it sits square
The lid should drop about 2.5 cm and stop, leaving about 2.5 cm of the base wall showing (5 − 2.5). The corners should line up. If the lid twists, one wall is longer than its mate. Replace that wall. Do not stuff the gap with tissue and call it square.
Steps 6: Cross two ribbons on the lid
Cut 55 cm for the long way. The path around the box is about 35.2 cm (12.4 + 5.2 + 12.4 + 5.2), and 55 cm leaves room for a small bow. Cut 48 cm for the short way, against a path of about 27.2 cm. Cross them on the lid. Glue only a dot at the center so the ribbon can still lie flat, then tie or glue the bow. A ribbon glued all the way around pulls the lid oval as it dries.
Steps 7: Add the label after the ink is dry
Cut a label 6 × 3 cm. Write the name, let the ink dry, then glue it on the ribbon cross. The lid top is 13 × 9 cm, so the label starts about 3.5 cm from the side and 3 cm from the front: (13 − 6) / 2 and (9 − 3) / 2.
Steps 8: Pack to the interior, not the outside
The interior is 12 × 8 × 5 cm. A gift taller than 5 cm holds the lid up. Tissue goes in first, then the object, then the lid. The ribbons stay on the lid, so you can open the box without untying them.
Final result
A base about 12.4 × 8.4 × 5.2 cm outside, interior 12 × 8 × 5 cm, and a lid with a 13 × 9 cm top that slides on with about 0.1 cm of ease a side. Ribbons of 55 cm and 48 cm cross under a 6 × 3 cm label.
Safety
- Score with the knife barely breaking the surface, then fold. A cut that goes through is a separate panel and a weak corner.
- Keep fingers behind the ruler.
- Stop a ribbon end with a dot of glue if it frays. Do not use a flame for this.
- The box holds a light gift. It is not a shipping carton. Do not pack anything heavy, wet, or sharp against the lid.
Tips and common mistakes
- Measure the finished base before you cut the lid. 12.4 and 8.4 cm assume 0.2 cm card. Thicker card makes a bigger outside.
- The ease is 0.1 cm per side, so the lid interior is 0.2 cm longer and 0.2 cm wider than the base outside.
- Common mistake: a lid cut to the floor, 12 × 8 cm. It cannot fit over a base whose outside is already 12.4 × 8.4 cm.
- Common mistake: glue tabs on the outside. They catch the lid. Tabs go inside.
- Score before you fold. An unscored 2 mm fold cracks, the wall leans out, and you lose the ease.
Related projects
Crafts & Gifts
Pop-up Greeting Cards
A 10 × 14 cm folded card with one measured pop-up panel that lies flat when it closes.
- Beginner
- 30–45 min
- $3–$8 USD (11–29 AED)

Handmade Photo Frame
A 15 × 20 cm cardboard frame with a 9 × 14 cm window for a 10 × 15 cm photo.
- Beginner
- 30–60 min
- $2–$7 USD (7–26 AED)
DIY Desk Organizer
A 20 × 12 × 10 cm cardboard tray with four compartments for pens, clips, and notes.
- Beginner
- 30–45 min
- $2–$6 USD (7–22 AED)