DIY Desk Organizer
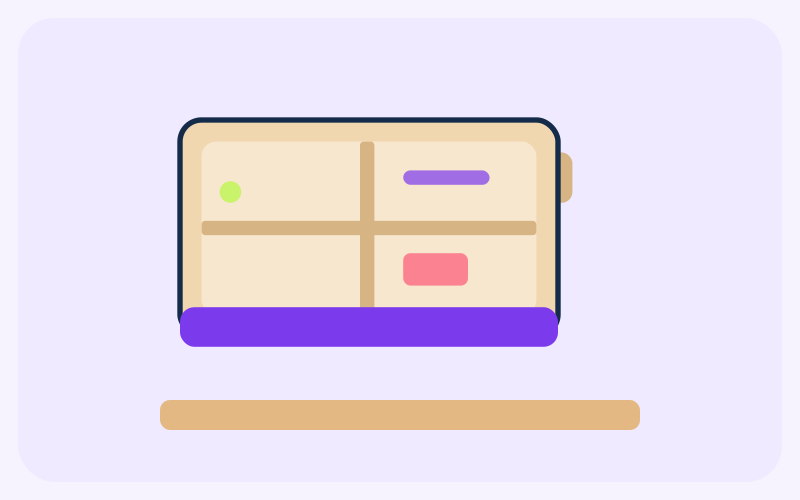
This organizer is a small desk tray, 20 cm long, 12 cm deep, and 10 cm tall on the outside. The front and back panels are cut at 20 × 10 cm. The sides are 11.4 cm, not 12 cm, because 3 mm board would otherwise overlap at the corners. The base drops inside at 19.4 × 11.4 cm. You finish with four compartments, about 9.55 × 5.55 cm.
- Difficulty
- Beginner
- Time
- 30–45 min
- Budget
- $2–$6 USD (7–22 AED)
Estimate; varies by location. The dirham figure uses the UAE peg of 3.6725 per US dollar, rounded to the nearest dirham. It is not a shop quote.
Materials
Ticks stay in this browser only.
Qty: two pieces, each at least 35 × 25 cm
Purpose: Walls, base, dividers, and corner strips
Qty: about 30 ml
Purpose: Joints, corner strips, and the paper facing
Qty: two sheets at least 21 × 15 cm
Purpose: Outside faces only
Qty: 1
Purpose: Labels on the back of each panel, and the cut lines
| Done | Item | Qty | Purpose |
|---|---|---|---|
| two pieces, each at least 35 × 25 cm | Walls, base, dividers, and corner strips | ||
| about 30 ml | Joints, corner strips, and the paper facing | ||
| two sheets at least 21 × 15 cm | Outside faces only | ||
| 1 | Labels on the back of each panel, and the cut lines |
Tools
- Metal ruler
- Craft knife or sharp scissors
- Cutting mat, or a thick magazine you can discard
- A book corner or a try square
- Damp cloth
Steps
Steps 1: Cut the shell to the thickness-adjusted sizes
On 3 mm corrugated board, cut the front and the back at 20 × 10 cm. Cut two sides at 11.4 × 10 cm. Cut the base at 19.4 × 11.4 cm. A 20 × 12 base with 12 cm sides is the outside plan, not the cut list: each wall is 0.3 cm thick, so full-size sides would overlap the front by 0.3 cm at each end and the footprint would grow past 20 × 12 cm. Label every piece in pencil on the dull side.
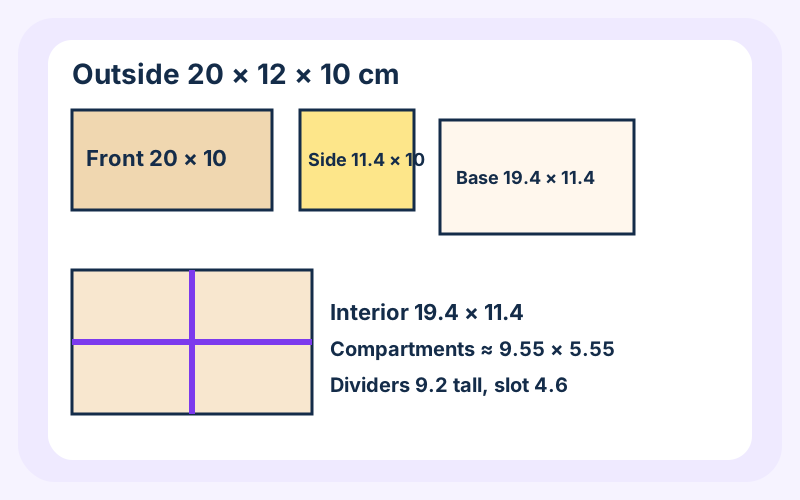
Note: Two sheets about 35 × 25 cm are enough. One holds the four walls. The other holds the base, both dividers, and the four corner strips.
Steps 2: Dry-fit the box
Stand the front and back on the long edges of the base, and set the sides between them. The outside footprint should read 20 × 12 cm, and the walls should stand 10 cm tall. The base sits inside, on the bottom edges, so it does not add to the height. If a side is long, trim it. Do not bow it into the corner.
Steps 3: Glue the walls and square the corners
Run a thin line of PVA along the base edges. Glue the front and back first, flush with the ends of the base, then the sides between them. Hold each joint for about a minute. Use a book corner as a square. Wipe squeeze-out so the paper has a flat face later. The inside length should now be about 19.4 cm and the inside depth about 11.4 cm.
Steps 4: Add the corner strips
Cut four strips, 9.7 × 2 cm. The 9.7 cm matches the inside height after the 0.3 cm base takes its share of the 10 cm wall. Fold each strip lengthwise at 1 cm. Glue one into each inside corner, sitting on the base and stopping at the rim. The strip bridges the butt joint.
Steps 5: Cut the dividers to the measured interior
Measure the inside. With 0.3 cm walls you should read about 19.4 × 11.4 cm. Cut the long divider 19.4 × 9.2 cm and the short divider 11.4 × 9.2 cm. The 9.2 cm height sits 0.5 cm below the 9.7 cm clear height, so you can lift a pen without hitting the divider. If your interior is a millimetre off, cut to the measurement, not to the drawing.
Steps 6: Slot the dividers at the midpoints
Mark the long divider at 9.7 cm and the short one at 5.7 cm. Cut a slot 0.3 cm wide, the same as the board, and 4.6 cm deep, which is half of 9.2 cm. Cut the long slot down from the top and the short slot up from the bottom so the two pieces cross. The four openings are about 9.55 × 5.55 cm: (19.4 − 0.3) / 2 by (11.4 − 0.3) / 2.
Note: If your board is thicker than 3 mm, widen the slot to the piece you are inserting.
Steps 7: Drop the grid in
Slide the dividers together and set them in the box. They should stand without glue when the lengths match the interior. If they rock, a dot of PVA at each end is enough. Do not flood the slots. A thick glue line makes the grid wider than 19.4 cm and the box bows.
Steps 8: Paper the outside faces
Cut front and back paper at 20 × 10 cm. Cut side paper at 12 × 10 cm. The side paper is the full outside depth, 12 cm, because it covers the 11.4 cm side panel plus the 0.3 cm edge of the front and the back. Glue the front and back paper first, then the sides. Leave the inside bare so pens do not catch a paper edge. Dry under a flat book for about 20 minutes before you fill it.
Final result
A rigid tray 20 × 12 × 10 cm on the outside, with four compartments about 9.55 × 5.55 cm and dividers 9.2 cm tall. Corner strips back every joint. The outside is papered and the inside is plain cardboard.
Safety
- Cut away from your other hand. Keep fingers behind the ruler, not in front of the blade.
- Cap the blade when you set it down, including while the glue dries.
- PVA is for paper and cardboard. Wipe it off skin. Do not switch to a solvent glue in a small room for this tray.
- The tray is for light desk items. It is not a step, a seat, or a holder for anything hot or wet.
Tips and common mistakes
- Write the panel name on the back before you cut the next rectangle. The walls look alike once they are off the sheet.
- Measure the interior after the glue is dry, and cut the dividers to that reading if it differs from 19.4 × 11.4 cm.
- Common mistake: cutting the sides at 12 cm as well as the front at 20 cm. On 3 mm board the sides then overlap the front and the box is no longer 20 × 12 cm.
- Common mistake: a slot narrower than the board. The divider bows and the four openings are not equal.
- Paper the box only after it is square. Paper hides a twisted corner. It does not fix it.
Related projects
Home & Organization

DIY Ambient Room Lighting
A USB LED strip in a cardboard channel, with tracing paper as a diffuser, for a shelf or headboard.
- Beginner
- 30–60 min
- $8–$18 USD (29–66 AED)
Cable Management Station
Three adhesive clips and one mount that keep light desk leads along a 30 cm zone.
- Beginner
- 20–30 min
- $4–$12 USD (15–44 AED)
Self-Watering Plant Pot
A rinsed drink bottle, turned into a planter with a cotton wick and a visible water reservoir.
- Beginner
- 20–30 min
- $3–$10 USD (11–37 AED)